...
Blog Archives

Fix Printer Experiencing Unexpected Configuration Problem

Printer Experienced an Unexpected Configuration Problem

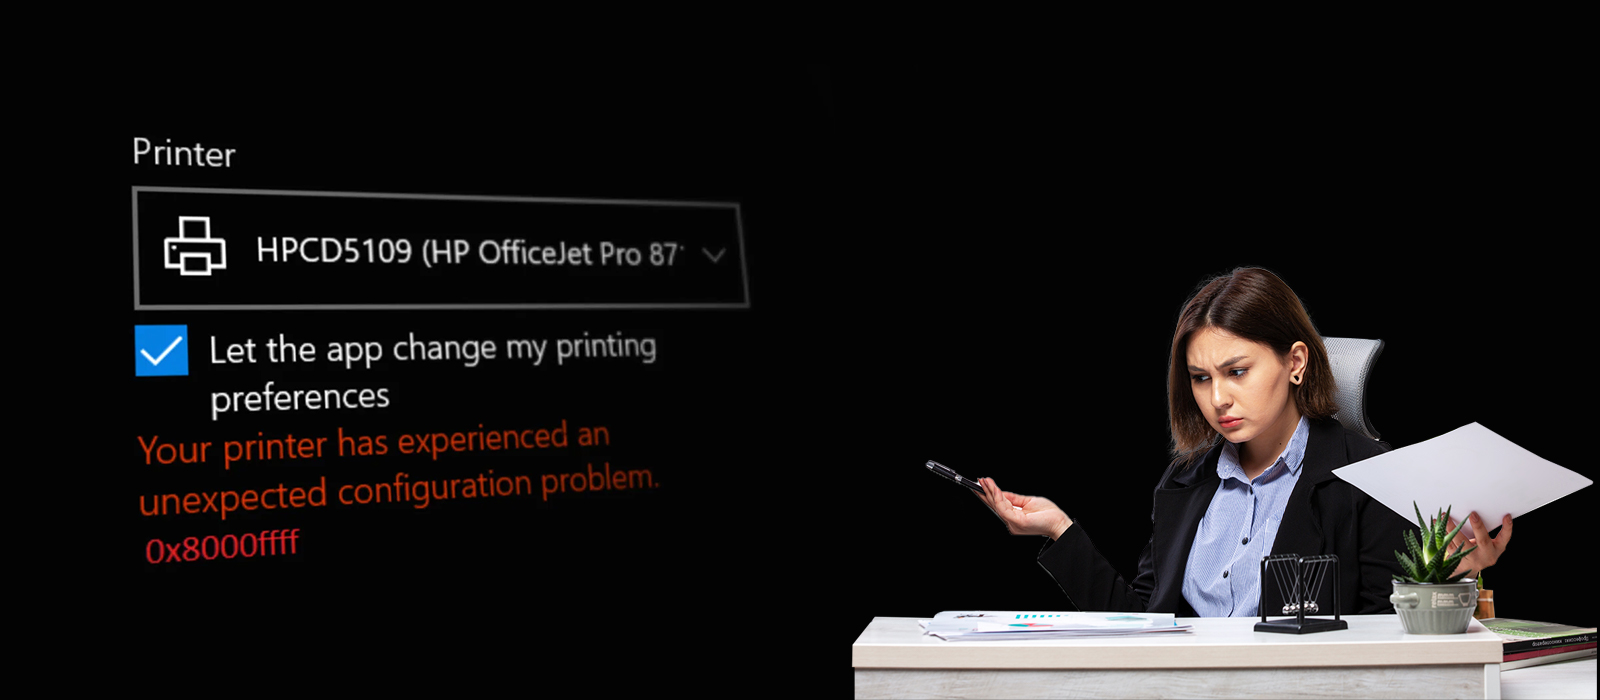
You are encountering similar messages repeatedly showcasing that your printer is experiencing an unexpected configuration problem. This general error code message, which might appear when there is a problem with a device or software’s configuration settings, indicates that your printer has encountered an unanticipated setup problem. When it comes to printers, it may be an indication of an issue with the software or printer driver, such as obsolete or conflicting drivers. 

These are common errors; you can fix them quickly if you know the trick. Sometimes, you will see that the error message is the same. However, the error code is different.

Some Easy & Effective Solutions To Resolve Printer Has an Unexpected Configuration Issue?

If you have an unexpected setup issue with your printer, consider these easy fixes before attempting more involved ones:

  • First, restarting your computer could occasionally resolve the problem.

  • Second, install the most recent version of Windows, mainly if an issue arises after you update your OS.

  • Third, try uninstalling and reinstalling the application in question if you’re experiencing problems printing from it.

  • Fourth, check to see if you can download and utilize a diagnostic tool from the printer maker to resolve any issues.

Fix Your Printer Experience an Unexpected Configuration Problem

If you have been experiencing this issue, then we are here with some suggestions that can help you fix this problem. Below are the errors that may hinder your printer, you can try any of these steps to resolve the printer experiencing unexpected configuration problems.

Updating Windows Update for Your Printer Driver

Any outdated or corrupted printer driver might result in this issue. A printer driver is a printer program that enables the computer to connect with the printer. You may make sure the printer is operating correctly and eliminate any problems brought on by an out-of-date driver by upgrading the driver.

  • Initiate this process by pressing the Windows+R key to open a run dialog box.

  • Now, type devmgmt.msc and press Enter. It will open the Device Manager.

  • Afterwards, click Yes to grant administrative privileges if prompted by the UAC (User Control Account).

  • Then, in Device Manager, you have to scroll through the list of devices and expand the Printers (print queues) dropdown menu.

  • Right-click on the printer you are having issues with and choose the Update driver.

  • Now, you have to click on Search automatically for updated driver software on the next screen.

  • Once you install the newest printer driver, restart your computer.

Manually Update the Printer Drivers

You can manually download and install the driver if Windows Update cannot update it on its own. It’s possible that the software included with your printer has the ability to update the driver automatically.

However, not all manufacturers provide this software. In that scenario, a general method to automatically update the printer driver on your computer is to remove the one you are using and download the most recent version from the manufacturer’s website.

  • The first step is to click the Windows+R key to open a Run dialog box. 
  • Now, type devmgmt.msc and press Enter to open Device Manager. 
  • Explore the dropdown menu of Printers or Print Queues.
  • Now, right-click on the printer you are having issues with and from there, select Uninstall device. 
  • Ensure you do not restart your computer during this time to avoid installing a generic driver and searching for Windows Update.  
  • Now, open your browser and search for the printer manufacturer’s website to locate and download the latest drivers. 
  • In order to prevent Windows Update from looking for and installing a generic driver version upon the next startup, do not restart your computer during this period.
  • Now, to find and download the most recent driver version, launch your browser and look for the printer manufacturer’s website.
  • To install the file on your computer, open the downloaded file and adhere to the on-screen instructions. The majority of printer drivers install themselves.
  • Then, restart your computer after installing the updated printer driver.
  • After the subsequent restart is finished, see if the problem still prevails.

Get Rid of Spooler Files to Fix 0x80010105 Printer Error.

Eliminating the spooler files might be the answer if your printer gives you unexpected setup issue errors. The Print Spooler service manages print jobs supplied to the printer.

Occasionally, this service may have file corruption or other problems that result in the printer malfunctioning and displaying an error message. The issue may be resolved frequently, and your printer will function normally by deleting the spooler files and restarting the service.

  • First, to open the Run dialog box, press Windows + R.
  • Second, in the text area, type services.msc, then press Enter.
  • Third, locate the print spooler service; you need to right-click on it and select Stop. 
  • Fourth, you need to press Windows+E to open the File Explorer. 
  • Fifth, you have to paste the following path in the address bar: C:WindowsSystem32spoolPRINTERS and hit Enter.
  • Sixth, delete all the files in the Printers folder by pressing Ctrl+A. Now select all these files and hit the Dlt key. 
  • Seventh, return to the services, right-click the Print Spooler Service, and choose Start.
  • Eighth, your problem must have been solved, and your printer will run efficiently. 

Remove the Printer and Add it Again.

You can easily remove your printer and add it again so that the printer experiencing an unexpected configuration problem resolves. To know how to perform this function, follow the below steps:

  • Start by accessing Settings; from there, press Windows + I. 
  • Now, from the left menu, select Devices, then Bluetooth & devices. Click on Printers & Scanners.
  • Select the offending printer by clicking on it, then select the Remove Device option. Click Yes to accept the modification when prompted.
  • Now, turn off the computer, unplug the printer, and then plug it back in.
  • To finish the procedure, go back to Printers & scanners settings, select Add a printer or scanner, and then follow the on-screen directions.
  • Your printer has encountered an unexpected setup problem. The error will be fixed after you have finished attaching the printer.

Using the Troubleshooter to Print

An integrated diagnostic tool called Printer Troubleshooter may automatically identify and resolve issues with printers and other printing devices. The printer has encountered an unexpected setup problem. The error is a frequent problem that may be fixed by using the Printer Troubleshooter.

Your printer may cease functioning correctly as a result of this. In this situation, using the Printer Troubleshooter can assist in determining the underlying cause of the issue and offer a fix to get your printer operating normally once again.

  • To bring up the Run dialog box, press the Windows key + R.
  • Then, type troubleshoot ms-settings and hit Enter.
  • Now, click on Additional Troubleshooter.
  • Again, go to the Getup and Running tab and click on Printer.
  • After that, click on the Run the troubleshooter button. 
  • Now, you have to wait till the initial scanning period is completed. 
  • If any repair strategy is recommended, click on the Apply Fix button. 
  • In the end, click on the operation is complete, then close the troubleshooting window.

Conclusion

We have briefly explained the different reasons for and solutions if your printer is experiencing an unexpected configuration problem. These steps will help you resolve this error, allowing you to get back to the functionality of your printer. If you have worked on all these steps and your problem still prevails, you can contact our experts for immediate assistance. We will resolve this problem using different methods so that you don’t have to suffer. Thus, We are your reliable partner and will focus on resolving your errors.


How to Fix Brother Printer Not Printing

Brother Printer Not Printing Error

Is your brother’s printer not printing, which is linked to WiFi for both Mac and Windows? Is your Brother printer printing blank pages? Do you also wonder why black text appears on white pages printed by Brother printers? These are not printing issues; these are the standard model of Brother printers.

You’re not alone if your printer, regardless of brand, has ink problems and won’t print. This is a typical issue. Since we’ll be concentrating on Brother printers in this instance, read the text attentively before you start fixing it so you can learn how to handle this annoying problem while exercising patience. We’ll go into the reasons behind this as well as fixes you may do to address the issue immediately.

Causes for Brother Printer Not Printing

Numerous factors can cause your Brother printer to stop printing or print poorly, even if you haven’t jumped the ink-out alarm. These include:

  • Cartridge Errors.

  • Damaged Cables.

  • Jams In The Print Queue.

  • Extremely Low Consumables.

  • Dry Ink Clogging In The Heads Of The Printer.

brother-printer

Nonetheless, the most frequent causes of this will be the main emphasis of the paper.

How to fix a Brother printer not printing even when it has ink

First things first confirm that the printer and computer are correctly connected, then confirm that the port you selected is the right one; after that, you need to ensure that there hasn’t been a print queue jam. After doing this, try the following actions if the printer is still not printing.

printer-assistance

Restart the System.

The most effective trick is also the oldest.

brother-printer-restart
  • First, disconnect the power cable

  • Then, turn off the printer.

  • At the end, restart the computer.

Gentle/Soft Reset

A quick and simple way to prevent Brother printer not printing is to perform a soft reset. Resolving minor difficulties with your Brother printer might be as easy as doing a soft reset. To soft reset your Brother printer, follow these steps:

  • First, you need to cut off the printer’s power

  • After that, the printer has been turned off by pressing the power button.

  • Then, remove the power cord.

  • Now, hold off for a minimum of 30 seconds.

  • Then, unplug the printer and let it sit for at least 30 to 2 minutes. This brief duration makes sure that the printer’s remaining power runs out.

  • Again, restart the printer to turn the printer back on, firmly re-plug the power cable into the device and click the power button.

printer soft-restart

Verify the Ink Cartridges’ Level.

We may examine our cartridges’ ink levels. From the control panel of the printer, brother. From the control panel of the printer, we may determine the ink level in our Brother cartridges:

  • First, select “Menu” by clicking on the start button.

  • Then, choose ‘Ink’ or ‘Ink Management’ using the arrow keys or the keypad, then hit OK.

  • After that, select ‘Ink Volume’ using the arrow keys once again, then click OK.

This issue will persist if the ink levels are too low.

Examine and Clean the Print Heads

Printing a test page is the initial step. The process for each model may be a little bit different. Nonetheless, this is the most typical method:

  • First, ensure the power wire is plugged in, and the front cover is firmly closed before turning off the printer.

  • Once all indicator lights are illuminated, press and hold the GO button.

  • After that, let go of the button and watch for another light outage.

  • Then the printer driver on the PC itself can also be used to accomplish this.

  • After printing the test pattern, examine the print quality and clean the print heads if necessary.

  • Look, locate and hit the INK button on the control panel if your printer has a touch screen. If not, click the “Menu” button, move up or down with the arrow keys to choose “Ink,” then click “OK.”

  • Now, again press ‘OK’ after choosing ‘Cleaning’ with the arrow navigators.

  • Depending on what you wish to clean, use the up and down navigation arrows to pick “Black,” “Color,” or “All,” then click “OK.”

  • Additionally, you may use the computer to clean the print heads.

Print a second test pattern when the cleaning is finished to check if the issue has been fixed. Additionally, keep in mind that ink is used to clean printheads. If the printheads are blocked, it might be necessary to do another cleaning cycle.

Verify the Port Configurations

It is another method that can resolve Brother printers not printing issues. To use this function, you need to follow the below steps:

  • First, on your computer, click the Start button.

  • Now, access the settings

  • Then, click the “Devices” menu and select “Printers & Scanners.”

  • Again, choose your printers and devices now.

  • Choose the printer you’re using from the device list, then right-click on it.

  • Then, choose the word “properties” from the drop-down menu.

  • Now, choose “change properties” from the general section under properties.

  • After that, select ‘Ports’ from the menu and click on the port where your printer’s name appears.

  • Ultimately, select “Apply” to complete the procedure.

Clearing the Print Queue

To remove items from the print queue, follow the below details:

stop-spooler-brother
  • First, click the Start button. Next, enter “services” into the Windows search box and select the “Services” option.

  • Now, choose Stop by right-clicking on Print Spooler. Next, reduce the size of the Services window.

  • Then, press the Windows logo key and the letter E on your keyboard at the same time to launch File Explorer.

  • Now, in the address bar, copy and paste the following address: %windir%System32spoolPRINTERS. Next, hit Enter.

  • Delete every file included in the folder.

  • At last, reopen the Services panel and select “Start” after clicking on “Print Spooler.”

paper-jam-assistance

Conclusion

You should be able to fix your Brother printer not printing by applying these methods. It’s essential to utilize original cartridges, update your drivers, and look for any other problems that may arise. If the error still pertains, get in touch with our experts for immediate assistance. Our experts will help you get this issue fixed in no time. Thus,  contact us now.


How to Solve Driver Unavailable for Printer Issue

How to Fix Driver Unavailable for Printer Issue?

You are giving printing demand to print, but it keeps popping up with the message driver unavailable for the printer. This is a common issue that everyone encounters with printers. Just like your mobile or laptop, printers need updated drivers to work smoothly and efficiently. However, this needs to be resolved in order for the printer to function appropriately. So, now we will assist you with how to fix printer drivers using different steps and keep your automated driver tool updated.

fix printer

Understand the ‘Driver is Unavailable’ issue.

This ‘Driver is Unavailable‘ error means Windows is unable to locate the right driver required to issue commands to your printer. This problem can be caused by incorrect, corrupted, or outdated drivers installed, or it may be that your system does not have the necessary access permissions. 

To let your system interact with the printer, dedicated software known as drivers act as an intermediary between the system and the printer. These drivers translate the requests from the operating system into commands that the printer’s specific make and model understand and execute. However, if the printer drivers are having an issue, the communication breaks down, causing the ‘driver to be unavailable’ error. 

Similar things happen to the other hardware components, although this is not the only problem that occurs with a driver unavailable message. Sometimes, faulty graphic drivers can surely slow down your streaming and cause your games to crash. So, if you are facing slowdowns, check the specifications of your computer and update your graphic drivers.  

The following are some typical reasons why your printer driver isn’t working:

  1. Faulty drivers: Manufacturers might inadvertently send driver updates with errors or problems from time to time, especially when they’re trying to fix a security flaw. In this instance, reverting your driver to the prior version will resolve the problem.

  2. Older or outdated drivers: Not only may out-of-date drivers lead to performance problems, but they might also eventually stop working with your devices. The most significant driver update software ensures you never miss a new release by monitoring driver updates for all your devices.

  3. Driver corruption: Just like other files on your computer, damaged drivers can also be caused by viruses, hardware issues, unplanned shutdowns, and program interaction. Using AVG Driver Updater to reinstall the driver will fix damaged files and run compatibility and virus checks.

  4. Antiquated operating system: An error stating “driver unavailable” may occur even if all of your drivers are up to date and completely working if compatibility issues prevent you from using the most recent version of your operating system.

  5. Windows updates: Because drivers are designed to work precisely with a particular operating system, modifications made to your system through Windows updates may result in incompatibilities. Remove the most recent update from Windows to revert the changes made until a driver update is available to address the issue.

  6. Inaccurate installation: It’s simple to manually install the incorrect driver while updating your drivers. Alternatively, the printer driver could not be available because you have the necessary driver but did not install it correctly.

Get Link to Download Drivers for Printer

Process of Fixing Driver Unavailable for Printer Issue

If you have Windows or any other operating system and printer drivers are unavailable for it, then you have to fix it in order to stop getting Driver Unavailable for Printer messages. There are some methods that can help you fix it:

  1. Reverse the printer driver: If you have recently updated your printer driver and you have been seeking this problem from that time, then you can blame this update. To fix it: 
  • First, open your Control Panel from the Start menu and click View Devices and Printers. 
  • Now, locate the affected printer, right-click on it, and from there, select Properties. 
  • Go to the Hardware tab and click Properties.
  • Now, go to the Driver tab in the new pop-up window and click Roll Back Driver. 
  • Then, click on Yes or No to confirm. 
reverse the printer driver
  1. Revise the driver for your printer: If your printer driver hasn’t been updated lately or if trying to fix the problem by going back to a prior version didn’t work, make sure you have the most recent driver version installed.
revise the driver for your printer
  • First, use the Start menu to launch the Device Manager.
  • Then, find your printer in the devices list and choose Update driver with a right-click.
  • So, if a driver update is available, click Search automatically for drivers and follow the installation instructions displayed on the screen.

3. Uninstall your driver printers: To clean the slate, you need to remove your printer driver from corrupted or incorrect installation. To do this, follow the below steps:

  • Initiate by opening a Setting section from the Start menu, then click Devices.
  • Now, select Printers and Scanners.
  • After that, Select the Printer Service Properties.
  • Then, click on the Drivers tab and select the problematic printer driver from the list of installed printers.
  • Once you find it, click on Remove.
  • At last, select Remove Driver and Driver Package, and click on OK. 
  • In case the above asks for confirmation, click on Delete. 
uninstall your driver printers
  1. Manually update your printer drivers: If you are done with the Windows update, and if the problem still prevails, you must also try updating your printers. Printer drivers are commonly found in the manufacturer’s support section. From there, you should download the latest version of it. To initiate this process:
revise the driver for your printer
  • First, open the Control Panel.
  • Now, on the top-right side of the dialogue, select Device Manager from the small icons view.
  • From the Device Manager, you can find the driver you wish to install. 
  • Then, right-click on the printer name and choose the option that shows Update Driver Software. 
  •  After this, a new window will appear with two options. You have to choose the one saying ‘Search automatically for updated driver software’.
  • In the end, follow the instructions to install the latest drivers for your printer. 

Conclusion

All the above methods can help you fix the driver unavailable for printer error. In case these methods are not helping, call our experts for immediate assistance. Our experts will listen to your issue carefully and provide you with solutions that work. We believe in bringing results with our techniques. You need to ensure that all your drivers are updated, which will automatically enhance your PC’s performance. Thus, you can even message or call us to get the support required.   


HP Laserjet P1102 Printer Driver Download

HP Laserjet P1102 Printer Driver Download

The monochrome laser HP LaserJet P1102 Printer is dependable and effective, providing high-quality printing for home and small business use. It’s a wonderful option for individuals wishing to conserve space without sacrificing performance because of its small size and quick printing speeds. The printer is simple to set up and use, and it produces prints with sharp text and graphics that are crisp and clear. Thus, HP LaserJet P1102 is not only economical but also environmentally friendly thanks to features like automatic duplex printing and energy-saving options. If you have a HP Laserjet P1102 printer but it is not working, then this blog is for you who will guide you on printer driver download.

Printer drivers help in commanding the printer due to which it is essential to download them and let the printer work efficiently. If you are unaware of how to download the driver, read the blog further to know.

Why Update HP Laserjet P1102 Printer Driver?

Driver updates are continuously released by printer manufacturers in order to repair faults and provide new features. It is crucial to update the printer driver in order to take use of these features and to facilitate computer interaction with the operating system.

Using Advanced Driver Updater, a driver updating tool for Windows, is the best way to update drivers without fiddling around. The utility makes it simple to backup and restore drivers as well as update drivers. Additionally, you can schedule driver scanning and add incompatible drivers to the Exclusion list that help drivers to update automatically on time.

Methods for HP Laserjet P1102 Printer Driver Download

There are three methods that will help you to download printer drivers. If you want to download these drivers for your HP printer than follow the below instructions:

1. Download, install, and update HP Laserjet P1102 printer driver download from official website:

To manually download the correct printer driver, first you need to know the exact version of your computer operating system. When you know the operating system of your computer you have to follow these steps:

  • First, visit the official website of the HP printer.

  • Select Software & drivers from the list under the Support tab.

  • Then from the product categories, pick Printer.

  • Now, Click Submit after searching for the HP LaserJet Pro P1102 printer.

  • Your OS system will be recognized automatically. Verify the data that was auto-detected.

  • Now, from the series list, choose the driver.

  • To get the driver installation file, click get.

  • The setup file should be double-clicked to launch the driver installation procedure.

  • Finally, PC restart required to apply changes.

This is how you will follow the process of HP Laserjet P1102 printer drivers downloaded from the manufacturers website.

2. HP Laserjet P1102 printer driver download using device manager:

This is the second method to download printer driver through device manager using the below steps:

  • First, you need to click on Windows+X and then, on device manager.

  • Now, go to the printer queues or printers, then from there double click on it and expand the category.

  • After that, select the HP printer driver, then right click on it, and choose the update driver option.

  • Now, you need to search for the drivers automatically.

  • Allow Windows to search for new drivers. It will be automatically installed if it’s available.

  • At the end, restart the computer to deploy the software update for the HP LaserJet Pro P1102 printer.

The above method is easy and convenient. WIth the help of this method you can immediately do the HP Laserjet P1102 printer driver download.    

3. Download and install HP Laserjet printers driver using automatic method:

Manually downloading the drivers can be tough for some people, whereas some people can download it manually. If you are someone who is encountering difficulty in HP Laserjet P1102 printer driver download manually, you can use this automatic method:

  • First, it is necessary for you to download the advanced driver updater.

  • Launch the advanced driver updater and click on start scan.

  • Now, you have to detect the problematic HP Laserjet P1102 driver.

  • Wait and review the scan results.

  • In case you are using the free version of the advanced driver updater, click on the update driver  available next to the printer drivers.

  • At the end, restart the system after updating the driver.

Conclusion:

The above points will explain how you can manually and automatically perform HP Laserjet P1102 printer driver download. All the points are easy and accessible. However, if you encounter any trouble while downloading the printer driver you can seek assistance from our experts. Our expert guide is available 24/7 and will help you with instant solutions. You can call, email, or chat with us to troubleshoot your HP Laserjet P1102 related issues.

Also Checkout – HP Printer Offline

FAQ: 

1. What kind of printer is the HP LaserJet P1102?

The HP LaserJet P1102 is a laser printer. Since it is a monochrome laser printer and can only print in black and white, it is ideal for producing text documents. When color printing is not required, laser printers are a popular option for home and office use because of their quick printing speeds, high-quality text output, and durability.

2. How to install a printer driver using USB?

The methods to install the printer driver are as follows if you have it on a USB drive:

    • First, connect the USB drive to your computer 
    • Locate the driver installation file by opening the USB drive.
    • Now, launch the installation file and adhere to the prompts on the screen.
    • When requested, link the printer to your computer.
    • Finish installing the driver.

3. Can I use my HP LaserJet P1102 with Windows 10?

The HP LaserJet P1102 is typically supported by Windows 10. The most recent drivers may need to be downloaded and installed from the HP website in order to guarantee compatibility and top performance.

4. How is the HP LaserJet P1102 installed?

Generally speaking, do the following to install the HP LaserJet P1102:

  • Open the printer’s box and assemble it.
  • Then, attach it to an electrical outlet and switch it on.
  • Installing the printer drivers is option c (see option 3).
  • Now, complete the installation by following the on-screen instructions.
  • Print a test page to make sure everything is operating properly.

5. How can I get drivers for my HP LaserJet printer?

The official HP website has drivers for HP LaserJet printers that you can download. This is how:

  • Go to https://support.hp.com, the website for HP Support.
  • Type the name of your printer model into the search field (such as LaserJet P1102).
  • From the selection, choose your operating system (such as Windows 10).
  • Download the suggested driver package and adhere to the setup guidelines.

Epson Printer Not Printing Color

Why Is My Epson Printer Not Printing Color

Epson printers are well-known for their great quality, cutting-edge features, and dependable performance. Epson printers offer a wide range of solutions for both home and commercial applications, from high-resolution photo printing to effective document handling with 20% market share in 2023. These printers offer seamless connectivity and exceptional output with cutting-edge printing technologies like PrecisionCore and user-friendly interfaces. However, sometimes Epson Printer Not Printing Color problems arise that may be frustrating for its users. If you are struggling with a similar issue, then this will guide you for the fixation of this issue.

When your epson printer does not print, there may be several reasons for it. To get your epson printer back in printing form, you need to follow the guide, as it will help you with ultimate solutions.

Common Reasons for Epson Printer Not Printing:

Your HP printer may become unresponsive for a number of reasons, including:

  • Ink Levels: Ensure that there is sufficient ink in the color cartridges. Low ink levels can lead to printing issues.

  • Nozzle Clogs: Clogged printhead nozzles can impede the flow of ink. Perform printhead cleaning to address this problem.

  • Driver and Software Issues: Outdated or corrupted printer drivers, as well as software conflicts, can hinder printing. Update drivers and ensure compatible software.

Epson Printer Not Printing
  • Connection Problems: Unstable or incorrect connections between the printer and the computer can cause printing failures. Verify both wired and wireless connections.

  • Paper Jams: Paper Jam Error can disrupt the printing process. Clear any paper jams and ensure that the paper is loaded correctly.

  • Settings Misconfiguration: Incorrect printer settings, such as paper type and print quality, can affect output. Verify and adjust settings as needed.

Methods To Fix: Why Is My Epson Printer Not Printing Color?

There are different methods to resolve this problem, and we will specify some of those below:

1.  Create a default setting for your printer:

Sometimes, it is possible that you have not selected it as the default printer on your computer, and your Epson printer could not be functioning. To make your Epson printer the default printer on your computer:

  • To open the Run box, simultaneously hit the Windows logo key and R on your keyboard.

  • On your keyboard, type “control” and press Enter.

  • Now, you need to select large icons under view by.

  • Click on Devices and Printers.

  • Now, right click your printer, and select the default printer.

This will help you resolve the epson printer not printing problem, and if this does not work for you, follow the next step.

2. Check printer spooler service:

The print spooler service on your computer helps you perform the print jobs. It also helps with the communication between the printer and your computer. If this service is not on, then your printer will not work. To know how to open and resolve the epson printer not printing problem, follow the below steps:

  • To open the Run box, simultaneously hit the Windows logo key and R on your keyboard.

  • Hit Enter after typing “services.msc” on the keyboard. The Services window will open as a result.

  • Now, click Print Spooler twice.

  • Make certain that its Service status is Running and that its Startup type is Automatic.

Epson Printer Not Printing-color
  • If not, click the Start button while setting the Startup type to Automatic.

  • Then, click on OK.

  • Finally, check whether your Epson printer starts working or not.

3. Check your printer’s condition:

If you have tried the above solutions and your epson printer is not printing, you should examine its hardware by:

  • First, check whether your ink or toner is going low. When necessary, you should swap out the ink or toner cartridge.

  • Then, install the original part and check to see if your problem is resolved or if it happens after you’ve replaced a part in your printer.

  • You should also look to see if your printer’s screen is showing any errors. If so, follow the instructions in the user manual or from Epson customer service to correct the problem.

  • Contact Epson’s customer service if you have any problems that you can’t fix on your own.

Some other methods that will help you with the Epson printer, not printing problem

If the above information does not help you with why my Epson printer not printing color, then below are some more points that will help you with the same issue:

1. Clear all print jobs:

If your printer’s print queue becomes blocked, you are unable to utilize it. To utilize your printer in this situation, you must empty your print queue with the following steps:

  • Start by pressing the Windows+R key together to run the run box.

  • Now, you need to type services.msc and press enter on your keyboard. It will open the service window.

  • Double-click print spooler.Now, click stop and on OK.

  • Thereafter, minimize the service window and open File Explorer by clicking on the Windows +E keys.

  • Now, you need to copy and paste this %windir%System32spoolPRINTERS and press enter.

  • Delete all the files from this folder , restore the service window and then double-click the printer spooler service.

  • Click on the start button; when the service starts, click OK.

  • Now, close all the open windows and turn off your computer.

  • Again, turn off your printer and unplug the power cable.

  • Do not use or leave your printer for 1 minute.

  • Now, plug the power cable and turn it on.

  • Turn on your computer and check if the printer can print or not.

2. Reinstall and Install the printers:

Try uninstalling and reinstalling the printer if updating the driver doesn’t work. It will help you with epson printer not printing:

  • To access Windows settings, press Windows + I.

  • Go to Devices.

  • Now, from the left pane, select Printers & Scanners.

  • Then, under Printer & Scanners, look for the printer you are currently using, select it, and then click Remove device.

  • Reinstall the printer by going back to Devices > Printer & Scanner.

  • Then, select the add icon to Add the printer. To finish the procedure, adhere to the on-screen instructions.

printer Not Printing

Conclusion:

We brief you on different points on how you can resolve your epson printer not printing problem. This problem is common and can be resolved easily. You can get all the information and settle your printing problem with the above steps. If you still encounter any kind of printing problem, then you can call our experts for guidance. Get in touch with us through call, email, or chat.

Also Checkout –  Epson XP 7100 Driver

FAQ: 

1. What does a printer reset key do?

You can physically reset a printer’s settings to their default values by pressing the reset key (sometimes referred to as the reset button). It can assist in fixing small hiccups and problems.

2. What should you do if your printer won't work?

  • Verify connections: Ensure the printer is turned on and the cords are firmly attached.
  • Reset equipment: Switch off your computer, router, and printer. Restart them after that.
  • Newest drivers: Visit the printer manufacturer’s website to get the most recent drivers.
  • Run troubleshooting tools: To find and resolve problems, use your computer’s built-in troubleshooters.

3. How can I use the printer diagnostic tool?

Running a printer troubleshooter involves:

  • If you’re using Windows, go to “Settings” > “Update & Security” > “Troubleshoot” > “Additional troubleshooters.” Locate the printer troubleshooter, then execute it.
  • Go to the “Apple menu” on a Mac, then select “System Preferences” and then “Printers & Scanners.” Right-click the printer and choose “Reset printing system.” Re-add the printer and then try printing once more.

4. What are some typical issues with printers and their fixes?

If you get paper stuck, carefully remove it by following the printer’s instructions.

Poor printing: Replace empty cartridges, check that the paper is the right kind, and clean the printheads.

Connection problems: Restart the printer and computer, check the cords, or turn on the Wi-Fi again.

Printer not working: Make sure both devices are on the same network, restart them, and set the printer as the default.

5. Why would my printer need to be reset?

Resetting your printer can assist with a number of difficulties, including connectivity issues, error messages, or sluggish behavior. To get your printer back in working order is frequently a troubleshooting step.


How To Fix Printer Offline

Get Guidance to Troubleshoot Printing Offline Error

In order to meet a variety of demands, printers are crucial equipment for creating tangible copies of papers, photographs, and other items. Not just this, printers provide ease by enabling on-demand access to tangible information, which is useful for producing expert reports and marketing materials as well as supporting creative initiatives and educational resources. Time-saving efficiency, the tactile and reliable character of printed papers, customizing choices, archival capabilities, and the capacity to reach populations without digital access are some of the advantages of printers. Moreover, continuous printing sometimes results in problems like offline printers, printers not printing well, and more. If you’re having any of these errors, then this blog will guide you on how to Fix Printer Offline problem. 

If your printer is not working or is continuously offline, then read the blog further to resolve your how to fix printer offline problems. Don’t go anywhere, as this blog has some tips for your printer.

Understand why your printer goes offline to resolve how to fix the printer offline.

Your HP printer may become unresponsive for a number of reasons, including:

  • Connectivity errors: Problems with connectivity can cause your printer to remain offline if it is cut off from your computer or Wi-Fi network.

  • Electricity Problems: If your printer doesn’t have adequate electricity, it could stop working.

  • Driver problems: A printer that has corrupted or outdated drivers may also stop working.

  • Paper jams: If your printer has a paper jam, it could become inoperable until the jam is cleaned.

  • Hardware Issues: A malfunctioning power cable or broken printer parts are examples of hardware issues that can cause a printer to stop working.

Primary steps to perform how to fix printer offline problems?

There are several methods that will help you how to fix printer offline problems. Read the blog further to know what are these steps:

1.  Check printer connectivity:

To establish a secure connection and set how to fix the printer offline issue:

  • First, make sure your printer is linked to your computer or Wi-Fi network.

  • Make sure the USB cord is plugged in if you’re using a printer that is linked that way.

  • Then, check to see if there are any connectivity issues and whether your printer is connected to the correct Wi-Fi network or not.

2.  Update your printer drivers:

It is not necessary to update your drivers if your machine is working properly. The offline printer is one such instance when updating the drivers may be helpful. Check the steps below for how to fix the printer offline:

  • First, press the Windows key + X and choose Device Manager to do this.

  • Now, double-click the Printers category in the new window.

  • Click Update Driver from the context menu of your printer.

  • Finally, check the printer’s manufacturer’s website again if no updates are discovered.

3.   Remove and reinstall your printer:

 It is necessary to remove and reinstall your printer so that how to fix the printer offline error gets a solution. The printer may need to be uninstalled and reinstalled if all other attempts to bring it online fail:

  • Select your printer under Start (Windows symbol), go to Settings (gear icon),

  • Then, from settings, search for Bluetooth and devices

  • Now, printers and scanners, and then click Remove.

  • Unplug the printer and restart it.

  • Finally, click the add device in the Printers and Scanners page’s Add printer or scanner section.

Some other additional methods to use how to fix printer offline issues.

If the above points do not work for your printer, then read the below points, as these are some additional points that will help you set your printer:

1. Run printer troubleshooting:

There are several troubleshooters that are designed to find and fix any problems. You can try running a printer troubleshooter in the hopes that it will resolve how to fix the printer’s offline problem:

  • To access Settings, press the Windows key + I

  • Then select Devices > Printers & Scanners.

  • Finally, click Run the troubleshooter under Related Settings on the right-hand menu.

The troubleshooter will then start up and perform a number of tests. If it runs into any issues, it will let you know what they are and how to fix them. You can select View full details to receive a breakdown even if it doesn’t discover any issues.

2. Set printer as default:

The last printer you used can be automatically assigned as your default printer. This can be useful, but it may also be the cause of the offline status of the printer you want to utilize. To settle the how to fix printer offline problem:   

  • Start by entering Settings by pressing the Windows key + I,

  • Now, choose Devices > Printers & Scanners.

  • Then, choose your printer and then click the enter queue.

Set As Default Printer may be available by selecting Printer from the top toolbar. It’s possible that you’ll receive a notification saying, “Setting this printer as default means that Windows will stop managing your default printer.” If so, select OK.

3. Check power supply:

A power supply is necessary when you want to work on how to fix a printer offline error. The below steps will help you how you can do that: 

  • Your printer can stop working if it doesn’t have adequate power.

  • Make sure your printer is connected and that the power cord is in good condition.

  • Additionally, you might want to try connecting the printer to a different power source.

Conclusion:

If your printer is also having issues like how to fix offline printing, then you can follow this blog. This blog has several steps to follow and will help you get the right solution. However, if you didn’t have time to do this setup, just give us a call, and we will resolve this error instantly. Get in touch with us to settle all kinds of printing problems with expert guidance from our professionals. Give us a call, email, or chat with us for an instant solution.

FAQ: 

1. How can I find my printer’s IP address?

To find your IP address:

For Windows: 

  • First, open the Command Prompt and type ‘ipconfig’.
  • Then, look for the printer’s IP address.
  • You can see this connection in the active connection setting.

For Mac:   

  • First, go to the system preferences. 
  • Then, on the network and from there, select your active connection.
  • Lastly, Advanced TCP/IP.

2. How to reset a printer?

Model-specific reset procedures may exist, although generally speaking:

  • Disconnect the electricity and turn off the printer.
  • After a little delay, reconnect the power.
  • Holding down particular buttons (such as “Cancel” or “Power”) will turn on the printer.
  • Then, hold on to the printer until it resets or displays a reset message.
  • If any on-screen instructions are given, let go of the buttons.

3. How do I get my printer back online?

In order to get your printer online:

  • First, ensure that your printer is on.
  • Verify the printer’s network or computer connection.
  • Then, restart your computer and printer.
  • Restart the print spooler after clearing the print queue.
  • Now, install new or updated HP printer drivers.
  • Start the HP Print and Scan Doctor program.
  • At last, investigate network or connectivity problems.

4.How can I get my printer online again?

A disconnected printer can be reconnected by:

  • Verify the power and connection.
  • Now, restart your computer and printer.
  • Set the default printer.
  • Then, restart the print spooler after clearing the print queue.
  • Reinstalling or updating printer drivers.

5. Why does my printer appear to be inactive?

A printer may display offline as a result of:

  • Connection problems.
  • A printer’s condition or power.
  • Network issues.
  • Errors with the print spooler.
  • Software or driver issues.

+1(855) 201-8071